vSync ⇄ Meta
Setup Guide
Follow these steps to connect V-Sync to Meta and start tracking new customer events.
1
Install V-Sync on Shopify
- Install via the Shopify App Store:
🔗 https://apps.shopify.com/vsync - Open the app from your Shopify admin once installation is complete.
2
Integrate V-Sync with Meta
1.1 — Find Your Pixel ID
- Go to your Meta Events Manager and click on Datasets (https://business.facebook.com/events_manager2/overview)
- Select the Pixel (Dataset) you want to connect.
- Click on Settings.
- Hover over the Pixel ID (Dataset ID) and click it to copy.
- Paste the Pixel ID in your vSync Settings page.
*Note: If there is no Dataset ID, you'll have to create one.
How To Create A New Dataset
- Go to your Business Manager Settings (https://business.facebook.com/settings)
- Look for Datasets & pixels under the Data Sources navigation.
- Click the + Add button to open Create a new dataset.
- Enter the Name of your dataset and click Create.
1.2 — Create Your CAPI token
- Go back to the Settings page on Events Manager.
- Scroll to Set Up Direct Integration under the Conversions API section.
- Click Generate Access Token and copy the token.
- Return to the vSync Settings page and paste the token.
- Click Save Settings to complete the setup.
3
Improve Your Tracking
1. Activate Auto-Advanced Matching
- Go back to the Settings page for your Pixel (Dataset).
- Find “Turn on automatic advanced matching” and toggle on Automatic website matching.
- Open “Show customer information parameters.”
- Toggle on all available parameters.
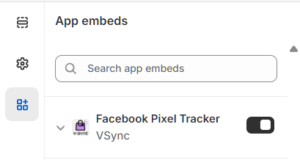
2. Enable Theme Extension
- Log into Shopify and go to your Themes under Online Store.
- Find your active theme and click Edit Theme.
- Click on the App Embed and toggle on the Facebook Pixel Tracker by vSync.
4
Setup New Customer Tracking in Ads Manager
V-Sync automatically creates a custom event for new customer purchase in your Dataset. Complete the setup to display NC-Purchase in Meta Ads Manager.
1.1 — Confirm The New Customer Event (NC-Purchase)
- Go to your Meta Events Manager “Overview” tab (https://business.facebook.com/events_manager2/overview).
- Click Review Events next to any unverified event alerts.
- A dialog box will appear. Click “I Acknowledge.”
- Select NC-Purchase and click Next.
- Select the Confirm Custom Event option and click Confirm.
The confirmed event status will become “active” once the next qualifying event is sent.
- Go to the “Datasets” tab of Events Manager and select your Pixel ID (Dataset ID).
- Scroll down to look for “NC-Purchase” under Events and confirm it is Active.
5
Set-up Metrics in Ads Manager
1. Activate your custom event in Ads Manager
- Create a temporary Campaign/AdSet/Ad and set the Ad Set optimization event to NC-Purchase (or the custom event you need to activate).
- Publish the temporary Campaign/AdSet/Ad (it can be paused to avoid spend).
- Your custom event should now be recognized by Meta Ads Manager.
2. Add your custom event to a column
- In your Ads Manager select Columns → Customize Columns.
- Scroll to Custom events and select your new custom event to save it as a column.
Your NC-Purchase custom conversion should now appear in your dashboard for reporting.
You're Done 🎉
NC-Purchase events will automatically start flowing. You can now report and optimize on new customers in Meta.